Set up the Move Approvals
You can set up the Move Approvals so that email notifications are sent out to the relevant approvals when Move Triggers are breached.
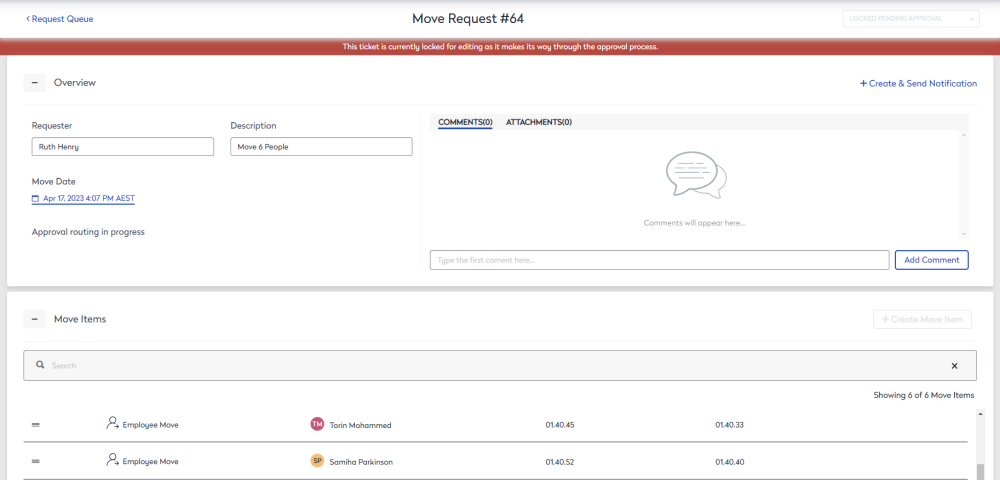
For example, when a move request is submitted and has met one of the move approval triggers the ticket will be locked until it is approved. A red banner will be displayed if the move is locked. The move request status will also say Locked Pending Approval.
Before you set up the Move Approvals, you will need to enable Advance Move Approval, see Edit Move Preferences.
Create the Move Approval Template
When the preference is turned on you then can create the approval triggers.
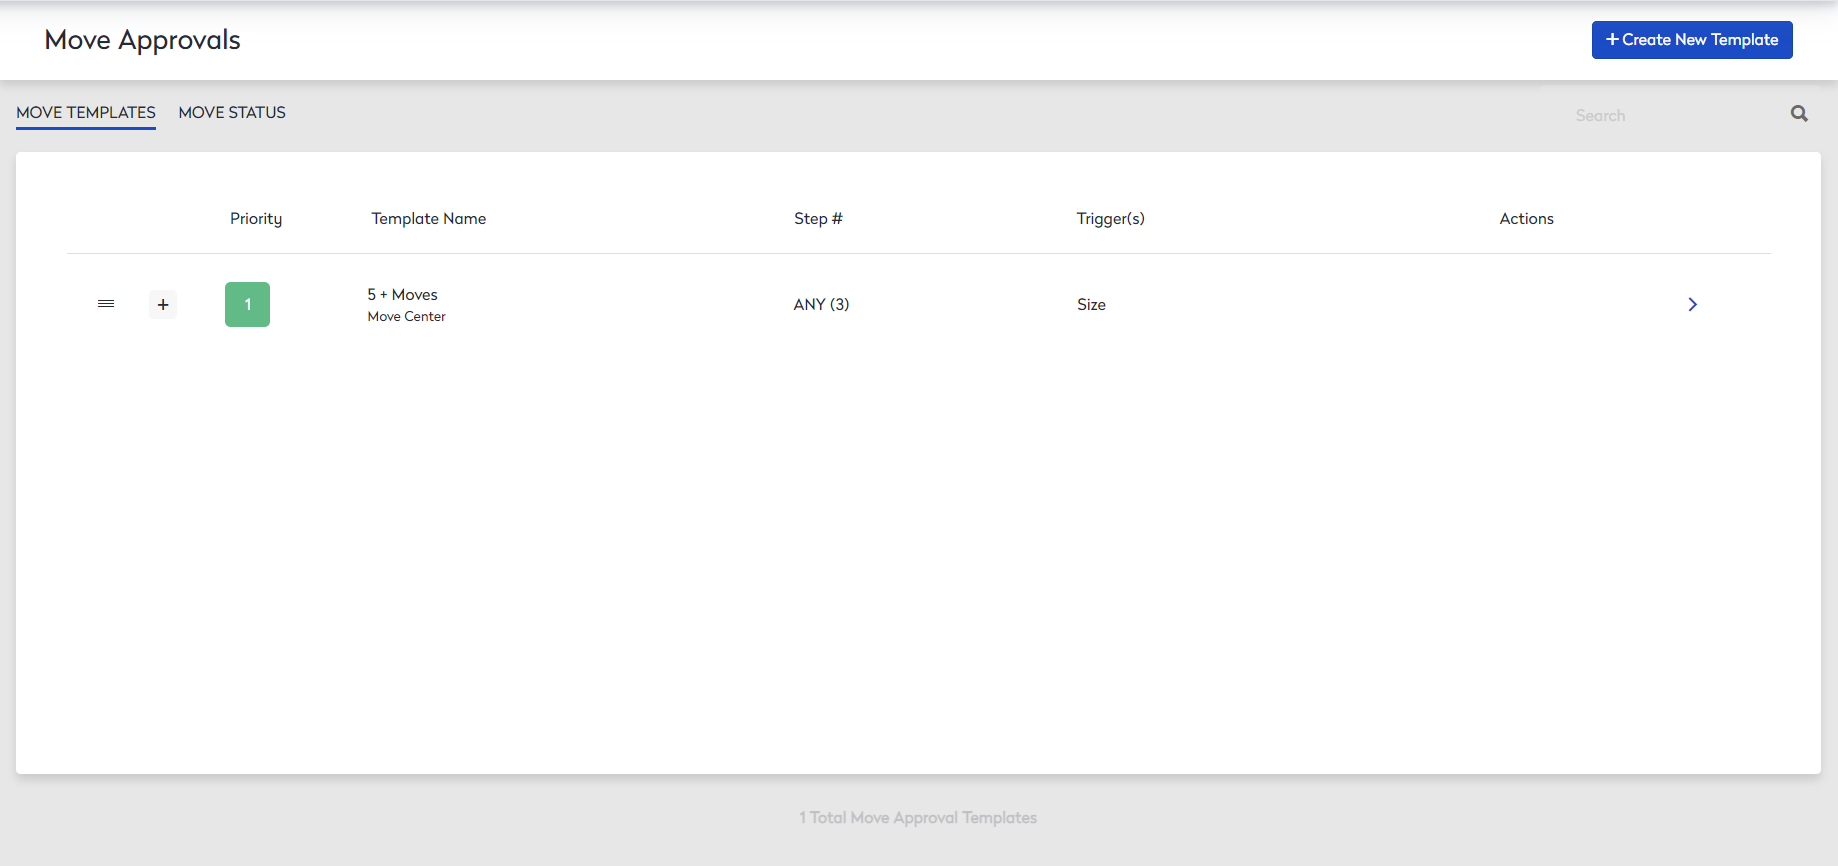
1. Click the Admin > Move > Approvals.
- Click the Create New Template button.
- Type a Template Name and select a Template Color by clicking the color picker.
- Click the + Add Trigger button.
- From the Trigger drop-down, select either:
- Location - Choose a location to trigger move approvals
- Size - The number of move items in a move. Greater than, Less than, and Equal to rules can be applied with a numerical value for this move approval trigger.
- Move Cost - The amount it cost per move. Greater than, Less than, and Equal to rules can be applied with a numerical value for this move approval trigger.
Then set the criteria for the trigger.
Next, choose the approvers as they have the ability to send notifications to key personnel such as internal move teams.
- Click the + Add Approver button, choose specific users or groups of users.
- Click the + Add Notifications button.
- In the Live Search field, enter the person's name.

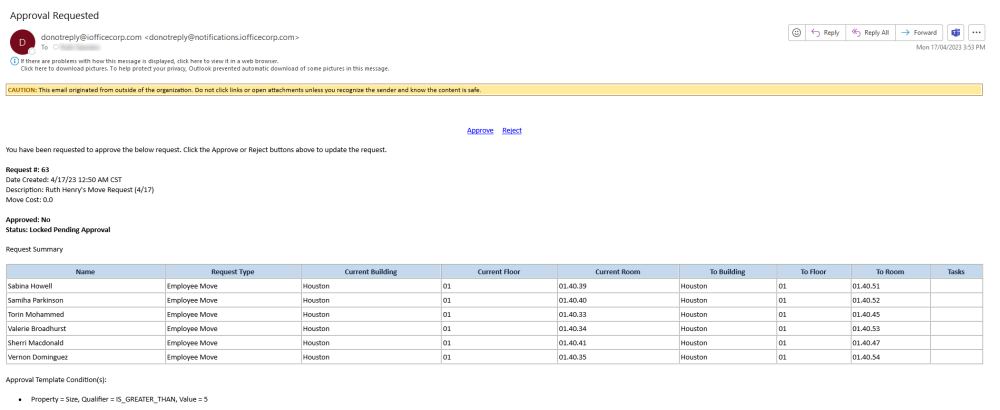
If someone is added to the notification list they will receive a notification email once the move has the final approval. The email will look similar to the email below.
- Click the +Create New Template button.
When a Move Template is created it is automatically assigned a priority.
The priority is the order in which the templates are triggered starting with one being the top priority. The Templates can be rearranged by clicking and dragging the Template to set the priority.
Resend the Move Approval
- Navigate to Admin > Move Approval.
- Click the Move Status tab. The Move Status displays the columns Request ID, Approvers, Status, and Original Date Sent.
- Click the + icon to expand the request to see the additional information, such as Last Email Sent date and the how many times the notifications were sent out can be found under Notified column
- If you need to resend the approval then click the Resend button and the message "Are you sure you want to resend this email? displays.
- Click the Resend button.
Cancel a Move Approval
If the advanced move approval needs to be canceled do the following steps. After the approval is canceled the move request can be edited again.
- Navigate to Admin > Move Approval.
- Click the Move Status tab.
- Click the CANCEL button. The message "Are you sure you want to cancel this approval?"
- Click the Yes button.
